Blogarama is stealing my content
Evidently Blogarama is a scam website that scrapes popular blogs and reposts them in iframes as their own. If you reached this site from blogarama, please go directly to www.somemonkey.com
Thanks!


Evidently Blogarama is a scam website that scrapes popular blogs and reposts them in iframes as their own. If you reached this site from blogarama, please go directly to www.somemonkey.com
Thanks!

Finally going to start work on the 550 and the 350!
I’m starting by replacing the throttle cables, left and right controls and tires on the 550. I’m simultaneously rebuilding and installing the carbs on the 350. These are pictures of the 550 but I’ll have pics of the 350 coming soon with more updates. Stay tuned!

This CB 350 is my next project bike. I’m buying this from a friend that has had it for a few years but unfortunately hasn’t had the time to work on it. All I need to do is get the carbs and fuel tank on it, change out a couple seals and gaskets and it should run. Once I get it running, I’ll decide then how to approach it from a rebuild point.

Taking off the center stand after the kick stand broke off. It’s funny because I was just telling a friend that I was thinking of removing the center stand then as I was heading home, the damn thing broke.
After a long hiatus I’m finally going to continue updating this blog. I’ve done a lot of work to my bike but there’s a lot more work to be done.
First let me apologize for the lack of content on the new site. I am working with my developer to get all previous posts moved to tumblr from our old host. We had to change hosts because of the serious lack of security on their end. For those of you who are not aware, our site was hacked and malware was installed on the site. That was the second time the site was hacked and we decided that enough was enough…..Time to move on.
Anyway, I hope to have the site back up and running with our new host within the next week. Please come back for updates and feel free to email me if you have any questions.
Mike.
somemonkey.com
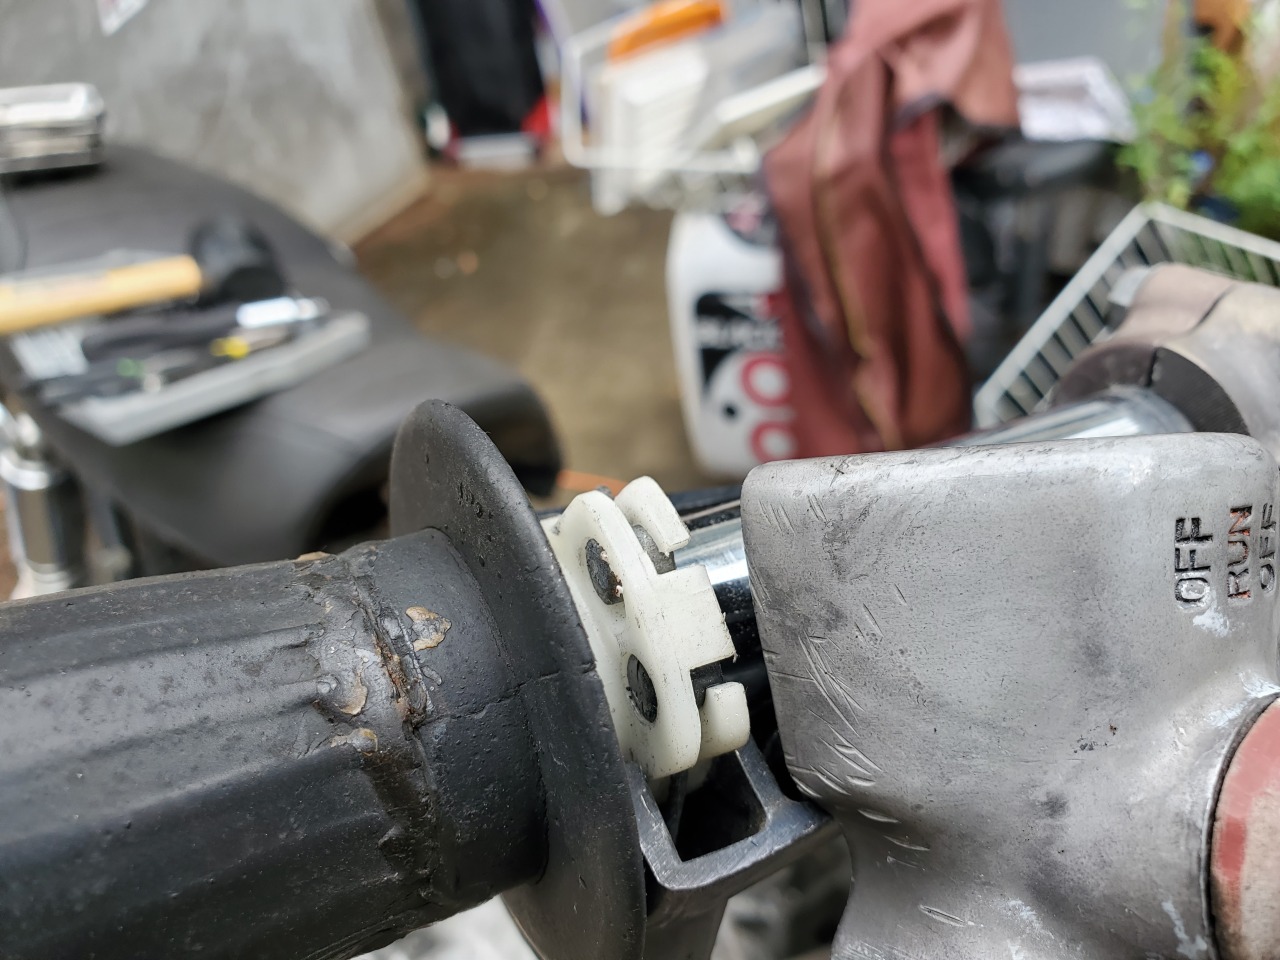
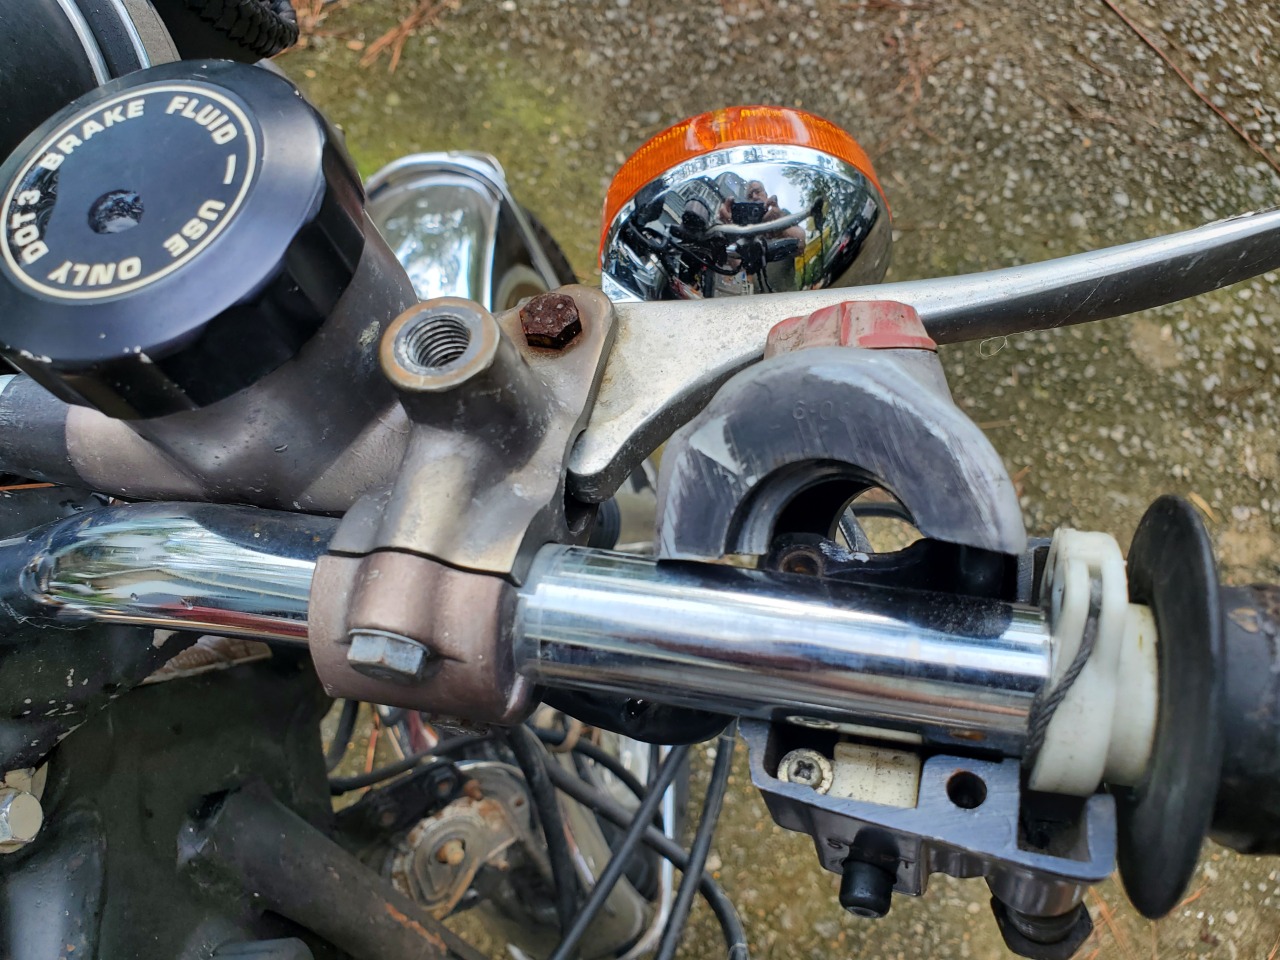
Hello everyone. I know it’’s been a long time since I’ve rapped at you but I’ve been really busy with my family, house and some new woodworking projects. My love of working on the 550 hasn’t dimmed, it’s just slowed down a little since the bike is running well and I don’t have any money to work on it. Though there is a lot to do on the CB550, I have also been helping a friend work on his CB350. A few months ago we took off the carbs (which is a heckuva lot easier to to on a 350 than it is a 550!) and cleaned them up. We changed out the jets, seals and screws. We added a new clutch cable and are currently in the process of switching out the old handlebars for new ones along with new grips and bar end mirrors. Once we get the bike running strong we would like to update the old clutch with something completely different. The plan is to create a thumb clutch or some other method to make it much easier for my friend Dan to use it. You see, he had an accident when he was a kid and it caused him to lose strength in his first three fingers on his left hand. While his fingers are strong enough to hold the handlebars and keep control of the bike, he has trouble pulling the clutch in easily. We’re considering a few options but haven’t settled on anything. If you have any ideas, please feel free to share them with me. I would love to know what some of you have done to modify your clutch. Anyway, we fired up the 350 the other day and it ran OK with the choke set but it quickly died when we turned the choke off. We discovered that fuel wasn’t getting to the left carb because fuel wasn’t flowing freely from the petcock. The tank was drained but we haven’t taken the petcock off to look it over. We suspect since the previous owner had used Cream to coat the fuel tank that some has come lose and clogged the petcock. If that’s the case, we plan on using Aircraft stripper to get the Cream out of the tank. Then our plan is to fill the tank with BB’’s, wrap it in a quilt and run it through a dryer to get all the rust out.
Most times I like to do things the easy way. I enjoy getting things done as fast as possible while also doing the job right. However, sometimes if I manage to miss a step in the process I talk myself into believing everything will be fine and that the step I missed wasn’t really that important. I’m sure I don’t need to tell you that when you’re dealing with a motorcycle you want to avoid missing any steps while completing all maintenance procedures. I believe this is what they call “learning the hard way”. A couple weeks ago I did just that.
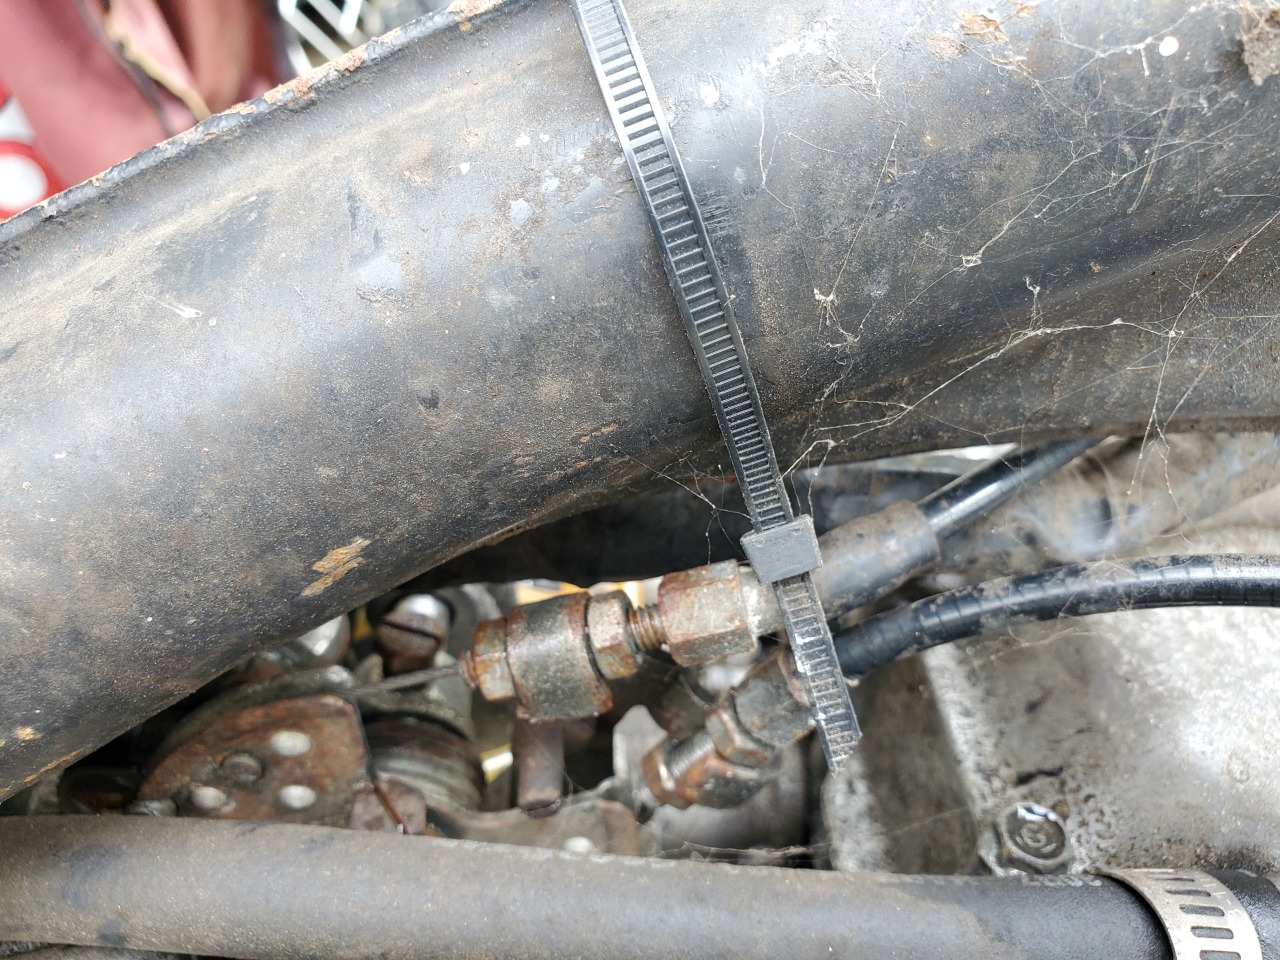
I replaced the old O-ring chain that the previous owner had on the bike with a standard RK 530 chain. It was a challenge getting the old chain off because I had to dremmel through one of the links but it was really easy to put the new chain on. All I had to do was run the chain over the rear sprocket and install the master link which was no problem at all. The box the chain arrived in even had a little diagram on the back showing me how to install the little clip that holds the master link together. It clearly says: IMPORTANT, INSTALL THE CLIP SO THAT THE CLOSED END FACES THE DIRECTION OF TRAVEL. How easy is that? Evidently not too easy, for me anyway, because I screwed it up. I read that part before I installed the chain and again after I put clip on the master link. I did a double-take on the master link only to realize that I had put that little clip on backward. Instead of the closed end facing the direction of travel, it was facing away from the direction of travel. Now, I could have fixed this error by pulling the clip off with a flat head screwdriver and a pair of needle nose but I was excited to finally have the new chain on the bike. I figured it wasn’t THAT important to have the closed end facing the other way. After all, what could possibly go wrong?!
It was ten O’‘clock on a Saturday night, about two weeks after I installed the new chain, that my laziness would come back to haunt me. I just got off the freeway and was about five miles from home. I was feeling pretty good. I just left a buddies house where some friends and I had gathered for a great meal and some fun playing Nintendo Wii. The weather was perfect. I was thinking that as soon as I got home I would grab a beer, sit on the couch and watch a horror flick on pay-per-view. That’s when it happened. I heard the most God awful grinding noise come from the motor and the motor immediately died. I made sure traffic was clear and I coasted the bike into a church parking lot. That’s when I realized what had happened. Damn chain broke. I felt like such an idiot. If I would have put that stupid little clip on the right way I wouldn’t have been sitting there like a jackass. I called my wife and she came to pick me up about 15 minutes later. The bike would be safe in the church parking lot until morning when I would push it to a friends house about a mile away. That mile was great for about the first 3/10ths because it was down hill. The rest of the way was up hill. If you’re not aware of this already let me tell you; It is no fun pushing your bike up hill for nearly a mile on a cold Sunday morning. I guess I will chalk this one up as a lesson learned - The hard way.
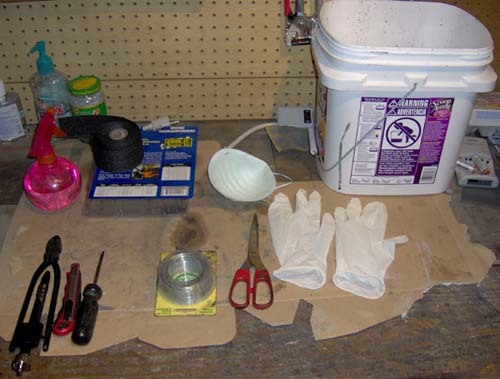
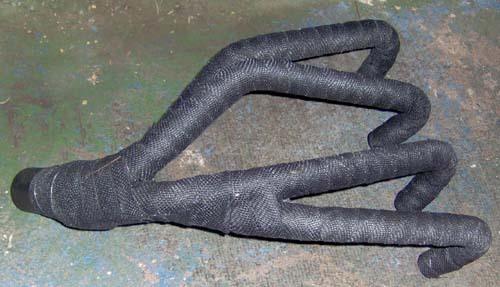
I finally got around to wrapping the pipes with heat wrap. I found a 50ft roll of 2" thick Thermotech heat wrap online for about $40 and after letting it sit around for months I finally put it to use. It was easy to install but there were some precautions I had to take. First was wearing gloves. I bought a pair of those semi-thick rubber dish washing gloves you find at Target or the grocery store. I thought it best to use a thicker rubber because those little fragments of fiber glass would probably punch through regular surgical gloves. (I use surgical gloves when changing oil or working with especially greasy parts). Also, I wore a pair of safety glasses just in case. Something I didn’t wear, but wish I did, was a long sleeve shirt and long pants. If that stuff even brushes your skin, you’ll be itchin’ like crazy. I also made sure I had the following tools on hand: Bucket of Water / Steel Wire / Safety Wire / Pliers / Scissors / Gloves / Mask / Razor / Flat Head Screwdriver
First I wrapped one pipe loosely just to get an idea of how long I would need to cut the first piece. Once I had the pipe wrapped, I added about five inches and cut a strip of wrap. I soaked the strip in the bucket of water for about thirty seconds to a minute making sure every inch of wrap got wet. As I pulled the wrap out of the bucket I ran it between two fingers to wring some of the excess water out. You want to wet the wrap for two reasons: It allows it to form to the pipe as you wrap it and it keeps little pieces of fiber glass and carbon from floating around. I started at the end of the pipe where it connects to the motor. I made one full wrap around it and secured it with the steel wire. (later I regretted starting from the very end of the pipe because when I tried to re-install them, the collars and pipe joints wouldn’t fit over the pipe. I ended up having to cut about and inch of wrap back from the end with a razor so the collars would fit correctly). You might want to start about an inch to an inch and a half down from the end of the pipe. Once I secured the wrap on the pipe I then wrapped it down the entire length of the pipe overlapping each wrap about a quarter inch to half inch. My hands hurt and I had to rest a few times per pipe because I was pulling so hard on the wrap. You have to pull hard so the material forms to the pipe and also so you don’t get any loose spots. I did that to each pipe and ended up having to wrap the end of all pipes together at the bottom to make sure none of the paint was exposed. It took about 8 feet of material per pipe to complete the job. This meant that I had plenty left over just in case I need to repair a spot later on. The pipes look great now. Not only that but I think it actually improved performance. From what I have read, using heat wrap makes the bike run a little richer. This is actually an improvement for my bike because I’m running pod filters.
I finally started working on the bike again. I have to say I really thought I would have more time to work on it even though there would be a new baby in the house. Somehow I thought “those other fathers” really had time to work on their hobbies and that having a baby around the house wasn’t all that time consuming. Well, you fellas who know can go ahead and stop laughing because I have come to understand that my old version of reality differs quite a lot from my new version of reality. There really isn’t all that much time to work on other stuff when you have a new baby AND a “new to us house” (it was built in 1952). Like yesterday for example; I thought I would get some work done on the bike but instead I spent my time fixing the bathroom sink and printing out dozens of baby pictures for the extended family. But it all has a silver lining: I have a wonderful house and family. Believe me when I say I’m thankful for all of it. (Oh, and I have a pretty cool bike too) Anyway, enough rambling. Here’’s what I managed to accomplish in the few hours I had last week: I ordered a set of tapered pods a couple weeks ago along with new main jets. I knew that replacing the stock airbox would require bigger jets since there would be increased air flow to the engine. I ended up having to order four different sizes of jets since I wasn’t exactly sure what size I would need. Now, I have read in some places that you only need to go up one size if you have A) four into one pipes, and B) air pods. Someplace else I read that I would need to go up two sizes. Anyway, I order four different sized just to be safe. Up until now I had size 100’’s. The package I ordered had 110, 115, 120, and 125’s. I decided to go with the 115’’s to start with After I put the carbs back together I attached them to the engine (much easier now that that airbox isn’t there). Then came the disheartening realization that the pods wouldn’t fit. Man, I hate that feeling, don’t you? When you look at something and before you even lift a finger you just know it isn’t going to work. After contemplating the distance between the two outer carbs and the bike frame I just decided I would force them on. After all, I spent the money and I wasn’t going to get it back.
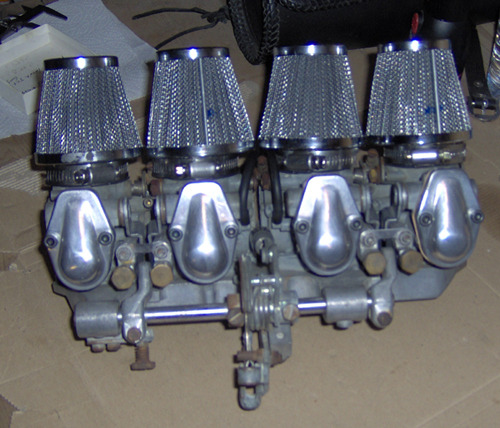
(Here are the carbs after they had been reassembled)
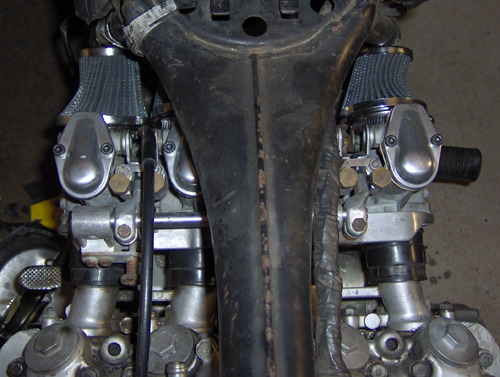
(Here they are on the bike. As you can see, they don’t quite fit) I pushed and poked and managed to get the pods on the carbs but the two outer ones were distorted because they didn’t have the proper clearance. To be honest, they didn’t look all that bad because both pods on either end were “positioned” the same. I figure they look symmetrical and I don’t really think performance will be effected. I’m going to leave them as is for now and see if the bike runs OK. In the mean time, I have to ask other CB550 owners who have been successful in getting pods on, just how they did it. As for the jets; They are working out just fine. The bike has been running great, though I suspect it has been running a little rich. I haven’t taken the plugs out for inspection yet but I have been riding the bike at least once a week now for several miles at a time and it runs really well. If I have one complaint it’s that I have to rev the motor before taking off from a stand still. If I don’t do that, the bike will stall out. I think it is because I didn’t change out the slow jets. They’re still the same size and I think I eventually need to go up one size. One other thing; After I put the carbs back together, one of the float bowls started leaking gas out of the overflow nipple. I purchased some carb kits online for about $50 and replaced the float valves and needles. After resetting the float height to spec, the bowls don’’t leak at all.